Making a Cased-in Photo Album: Cutting the Book Cloth and Cover Paper
September 2nd, 2007 | Link

Previously, I explained how to measure and cut the cover boards and spine piece for the case.
In this section, you’ll learn how to measure and cut the decorative paper and book cloth to cover the case. How much of your cover is book cloth and how much is decorative paper is a matter of personal preference. Common proportions are for the book cloth to take up 1/3, 1/5 or 1/8 of the cover board width. You’re going to need a little math for this.
Step 1: Measuring and Cutting the Book Cloth
I prefer a narrower width of cloth on my covers, as I think it shows off the paper better. So for my sample book I am going to go with book cloth covering 1/8 of the cover. My cover boards are 8" wide, so 1/8 of the cover board is (conveniently) 1". If your proportion doesn’t come to an even number, round up to the nearest 1/16th of an inch.
Take the value you just calculated and add 1/8" inch. The decorative paper will cover the raw edge of the book cloth by about this amount. For my sample book, my adjusted value is now 1 1/8".
Now double your adjusted value, because you need this amount for each board. For my sample book, this is 2 1/4".
In addition to the cloth that is actually glued to the cover board, you will need 1/4" on each side for the hinge, so add 1/2" to your current value. My new value is 2 3/4"
Finally, add the width of the spine piece that you cut out in Part Two. For my book, this was 1 3/8", so my total width is 4 1/8". You now have the width of book cloth that you will need.
For the height, take the height of the spine piece you cut out in Part Two, and add 1 1/2" inches to that. This is the amount that you will be folding over the boards when you glue everything together (3/4" on the top and bottom). The spine piece for my sample book was 9 7/8" high, so my book cloth height is 11 3/8".
Cut one piece of book cloth to the width and height that you’ve calculated. Ensure that the grain of the cloth is parallel to the spine.
Step 2: Measuring and Cutting the Decorative Cover Paper
Since I want 1/8 of my cover boards to be covered with book cloth, the remainder will be covered with paper. My cover boards are 8" wide; 8" less 1" is 7". Once again, if your width comes to a weird fraction, round it up to the nearest 1/16th of an inch. It’s better for the decorative paper to overlap more of the book cloth than to not have enough to cover it. Now add 3/4" to the width for folding over the fore edge. This is the width of paper that you need; in my case, 7 3/4"
The height of the decorative paper will be the same as the height of the book cloth (11 3/8" for my sample book).
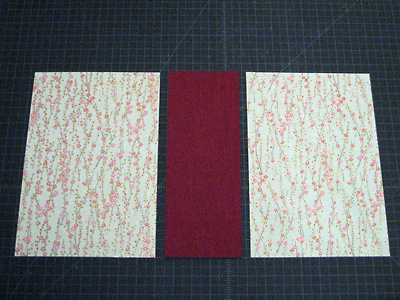
When you cut the decorative paper, keep in mind how it’s going to look when it’s glued to the cover boards. Chiyogami papers – and many others – are not silkscreened right to the edge of the paper: make sure you trim off the unpatterned parts, so they don’t show up on your book. If your paper has an obvious horizontal or vertical pattern, you will want to make sure that the front and back pieces match up at the top, bottom and fore edge of the book, so that if you look at the book sideways the patterns match. The front and back cover papers are mirrors: you’ll be folding over 3/4" on the right-hand side for the front, and 3/4" on the left-hand side for the back. And if your pattern has a “right-side-up”, you’ll want it to be the right direction on both the front and back covers.
Once you know how you want the paper to lay out on your cover, cut two pieces to the measurements you calculated above.
Next, I’ll explain how to assemble the case.


No Comments
RSS feed for comments on this post.