Sophie Bag
February 17th, 2008 | Link
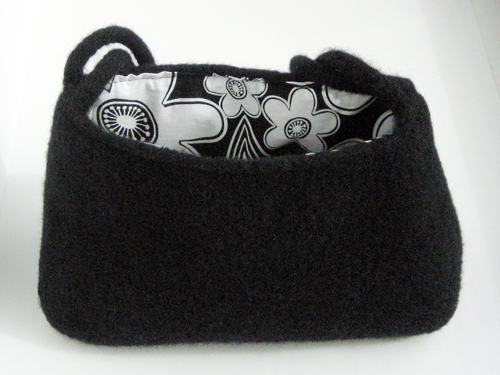
A few months ago I came back from Calgary with a number of skeins of Philosopher’s Wool 2-ply and 3-ply yarn leftover from various sweater kits, with the intention of experimenting with felting. My first attempt was the Sophie felted bag from MagKnits. I used 6.5mm needles and the Philosopher’s 3-ply wool, and did the shaping decreases every eight rows (instead of every 10 rows) for a shorter bag.
Of course I didn’t measure the bag dimensions before felting, or felt a swatch ahead of time, so I can’t tell you how much smaller the finished bag ended up compared to the pre-felting version. I ran the bag through the wash (in a pillowcase and with a few pairs of jeans, as the pattern suggested) twice in succession, then allowed it to dry, but I wasn’t happy with the results—it was too stretchy and the stitch detail was still evident. So I ran it through the wash another two times, and that was much better.
The finished size is 10" by 4" at the base, and 6" high. The top is about 2" narrower in each direction (8" by 2"). I lined it with leftover Prints Charming fabric from Sew U skirt number seven, and some lightweight fusible interfacing. It still needs a button and loop to keep it closed but I haven’t found the right one yet.
On the whole I’m happy with the results, but I’m not really a purse person so I don’t know what I’m going to do with it now!
¶ Posted in
Yarn | Tags:
knitting |
4 Comments »
Cased-In Photo Album Tutorial
February 8th, 2008 | Link

This hardcover photo album makes the perfect gift and is easier to make than you might think. It uses a purchased photo album block, so most of the hard work is done already. All you have to do is assemble the cover (the “case”) and glue the book block in place. With the wide selection of book cloth and decorative papers available, it’s easy to customize an album for any occasion.
Although this tutorial talks about photo albums, there are many types of pre-made book blocks available, including blank journals, trip diaries, date and address books, and even wine and baby journals. These instructions will work for any type of book block.
- Tools and materials
- Cutting the cover boards and spine piece
- Cutting the book cloth and cover paper
- Assembling the case
- Casing in the book block
For more photo album pictures, visit my bookbinding stream on Flickr.
¶ Posted in
Paper | Tags:
bookbinding,
patterns and tutorials |
Comments Off on Cased-In Photo Album Tutorial
Five, Six, Seven, Eight
January 27th, 2008 | Link
Apologies in advance for the terrible photography; it’s been raining for days here, so not much opportunity for outdoor shots. Great weather for sewing, though, so I’ve been doing quite a bit. I turned back to my perfect skirt pattern from Sew U: The Built by Wendy Guide to Making Your Own Wardrobe. And the results are in!
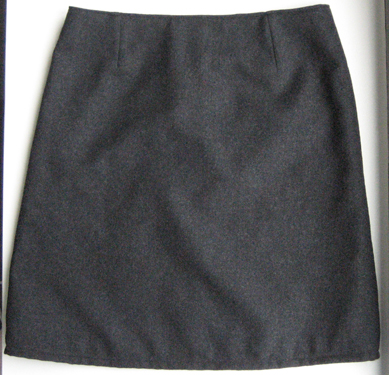
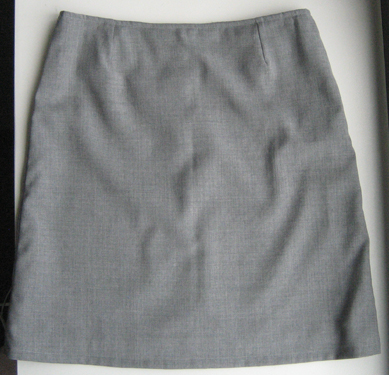
Sew U skirts number five and six are made from dark gray wool flannel worsted and light gray wool suiting, respectively. (Sense a theme?) They’re identical otherwise to the third skirt, fully lined and hemmed shortly above the knee.
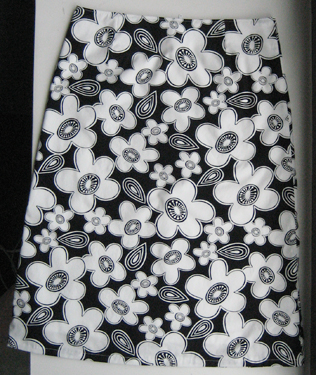
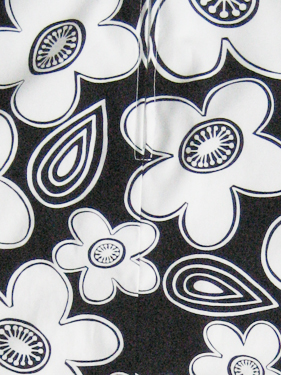
Skirt number seven is a longer skirt, like skirt number four, but an inch or so longer. This is a fun print from Prints Charming Fabrics—not my usual style, but with all this dreary weather it was cheery to work with and it will be a great spring skirt. It’s fully lined with white cotton. I didn’t think of changing the pattern into a side zip (and bypassing the need to try to match the fabric on the back) until after I’d already purchased extra fabric to do the matching and cut it out, but I’m happy with the results.
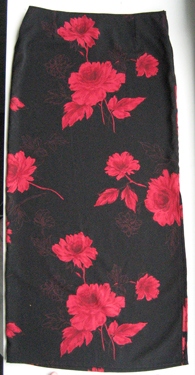
Skirt number eight is a departure from the others. I used the Sew U skirt pattern for the waist darts, but modified it from the hip down to be a straight, ankle-length skirt. It has a side zip (after my previous revelation) and a slit up to the knee on the same side. Very evening wear.
Here’s what I learned about putting in a side zipper: sew the side seam with the zipper first. Duh, right? Well, duh. Here’s something else I learned about putting in a zipper in general, from a great photo tutorial for making a change purse: when you sew in the zipper and you near the top, pull the head down past the needle so you don’t have to try to sew around it. So obvious, when you think about it, and yet it’s made the zippers on these last four skirts much easier and neater.
Now that I have a whole wardrobe’s worth of skirts, it’s time to turn my attention to tops…
¶ Posted in
Cloth | Tags:
sewing |
2 Comments »
Blocking Without Wires
January 17th, 2008 | Link
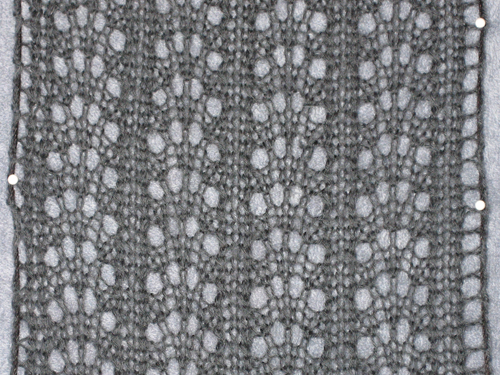
Somewhere I read a suggestion for blocking lace without wires, where yarn was threaded through the yarn-overs along the edges of the piece and then pulled taut. So I tried it for the long edges of the Rabbit Tracks scarf, using some leftover cotton yarn from another project. I think it would have been easier to thread the yarn through the yarn-overs if I had done so before I soaked the scarf, but aside from that, I’m impressed with how much straighter and lacier the edges are than the edge rows on the Bias Shawl. I’m almost tempted to block the shawl again using this method.
¶ Posted in
Yarn | Tags:
knitting |
Comments Off on Blocking Without Wires
Bias Shawl in Handmaiden Rumple Silk
January 6th, 2008 | Link
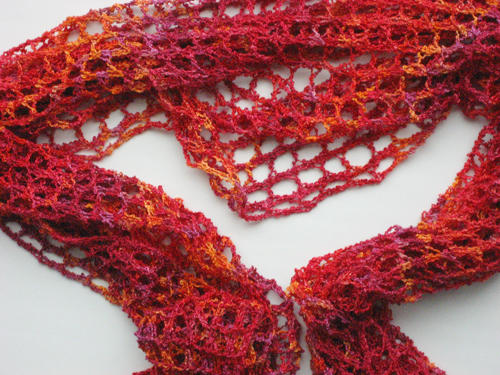
Yesterday I finished and blocked my Bias Shawl. I was worried when I finished the knitting part that the shawl would not be long enough, as I only had about 52 inches of length (a few other people on Ravelry said they had similar problems). But I blocked it to the width in the pattern (14 inches) with pins, and then stretched it as much as I dared as I blocked the length—I winced every time I pulled it—and the finished length is about 73 inches, which is only three inches short of the pattern’s stated length.
I thought it would be purely decorative, given the open lace work, but I was testing the length earlier today after removing all the pins and it does lend a bit of warmth. It drapes nicely over the shoulders, but it also crunches up to a good scarf width (as in the photo above), so I think it could be worn either way.
¶ Posted in
Yarn | Tags:
knitting |
2 Comments »
17 Crafting Days until Christmas
December 8th, 2007 | Link
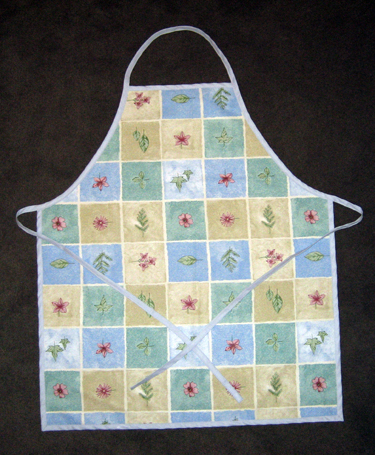
One yard of oilcloth, one yard of poly-cotton broadcloth (for the back), two packages of extra-wide double fold bias tape and about an hour of cutting, pinning and sewing. One package of the bias tape went around the straight edges on the left, bottom and right (all in one piece, with mitered corners), and the short straight edge at the top. The other package makes up the neck strap and the ties and binds the curved armholes – and neatly covers the raw edges from the other bias tape. So much faster to buy the prefolded bias tape and not have to do all that pressing!
¶ Posted in
Cloth | Tags:
sewing |
Comments Off on 17 Crafting Days until Christmas
Finished Objects: Shimmer and Foliage
December 1st, 2007 | Link
We had such a quiet, pleasant weekend for Thanksgiving that I was able to start and finish the Shimmer shrug. It is a pretty quick knit, since there is no front to speak of and the back is cropped.
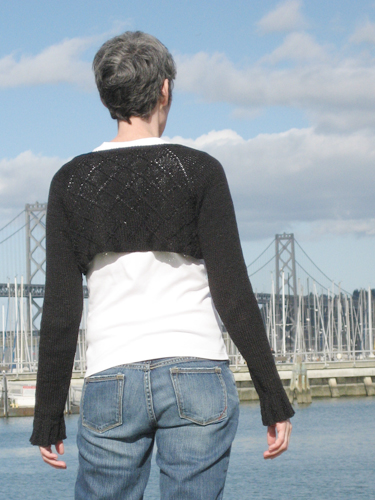
I messed up the lozenge pattern on the back, and I also think it’s just a touch too small through the back shoulders. If I were to knit it again – and I might – I would probably add an inch to the width in the back. Originally I had planned to wear it with a sleeveless dress, but it doesn’t cover the dress straps in the front, so I’m wearing it mostly with t-shirts. Shrugs are my favorite thing to wear at work, because they cover my arms with more warmth than just a shirt but don’t make me too warm.

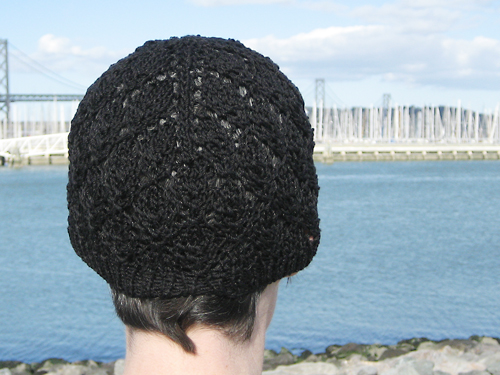
The shrug used less than six balls of Elann Pegasus yarn, and I bought seven, so with the leftovers I decided to knit up the Foliage hat from the Fall 2007 issue of Knitty over a couple of evenings during the week. I did the worsted-weight yarn version, but with only two repeats of the lace pattern after finishing the crown so it’s a bit shorter:
¶ Posted in
Yarn | Tags:
knitting |
Comments Off on Finished Objects: Shimmer and Foliage
Henry Scarf IV: Completed
November 18th, 2007 | Link

I tested the length on Edmond (who is slightly taller than the intended recipient of this scarf) and it’s fine, so I’ll pass on the fringe. I’m a little happier with it this morning, now that it’s blocked and dried. The stitch detail is not as fuzzy as I first feared.
There is another picture here in my Flickr stream.
¶ Posted in
Yarn | Tags:
knitting |
Comments Off on Henry Scarf IV: Completed
Henry Scarf III: Disheartened
November 17th, 2007 | Link
After five repeats of the pattern rows (around six inches), I decided the scarf was probably wide enough – or at least that I couldn’t face another 48 rows of the pattern at 15-20 minutes per row, so I’d had enough.
I’m surprised at how far off I am in comparison to the finished size of the scarf as given in the pattern, considering I was pretty much right on in the stockinette gauge. After blocking, the scarf is only 49" long – almost a foot off the 60 inches quoted – and slightly shorter than 7" wide. I assume that the pattern length came with the blocking, and it’s true mine could have been narrower and longer, but the ends flared out so badly that I ended up blocking to the width that best accommodated them and then making the rest of the scarf match. The width is good at five repeats. The cast on and cast off edges are not identical, but the tensions are similar and they don’t look mismatched.
After soaking the scarf the longer fibers in the Elann Peruvian Baby Cashmere obscured the distinct herringbone pattern a bit, though the fabric is soft. I used just over five balls (109 yards/100 metres) – I only tapped the sixth ball in the bind off.
The results are mildly disheartening, given the time involved. If I were going to knit it again I would probably cast on an additional hundred or so stitches for the length. I have enough yarn left to add a fringe, which should visually add a few inches and may camouflage the flaring a bit. I’ll see what it looks like when it’s dry.
¶ Posted in
Yarn | Tags:
knitting |
1 Comment »
Gocco Inspiration
October 31st, 2007 | Link
I have a B6 Gocco printer and I laid in a healthy cache of supplies when it appeared that the manufacturer would no longer support the product. But I rarely use it, mainly because I’m intimidated by the act of drawing something that is worthy of using the precious supplies (not to mention printing multiples thereof).
But Christmas is coming, and maybe I’m thinking about it early enough this year to print some cards.
In the meantime, I’ve turned to Etsy for some Gocco inspiration. The following are a few of the items that impressed me in my search. I am not the artist – click on the images to go to the artist’s Etsy shop.
This is the Butterfly Garden 2 print from TreeTop Studio. I love the simple graphics and the blue-gray color:

This is the Three Trees Make a Forest card from one girl two dogs:

Magic Jelly does a great job of tight registration in her Fox and Flowers print – mine never turn out this well:

The Red Branches and Bird print from Sugarloop really pops:

And more:
¶ Posted in
Paper | Tags:
gocco |
Comments Off on Gocco Inspiration


