Baby Kimono Redux
May 11th, 2012 | Link

A while back I posted about the baby kimono I’d made for a friend who was expecting. Well, here is Charlotte modeling it for me. Hello, cuteness!

A while back I posted about the baby kimono I’d made for a friend who was expecting. Well, here is Charlotte modeling it for me. Hello, cuteness!
Speaking of things that go well with onesies and stress-induced ADD requiring mindless handwork, more baby items were in order for this particular friend. It seems like it’s easier to find somewhat hip baby stuff these days — beyond the pink and blue and media-branded items — but who wants to pay $20 for something that baby is going to outgrow in a few months? So I used this übersimple gathered skirt pattern to throw together a couple of skirts to pull on over the onesies.
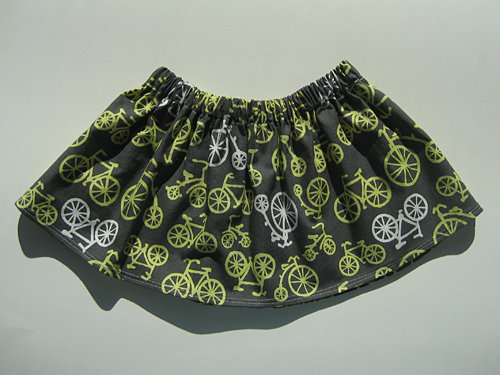
The bicycle skirt is a nod to the daddy-to-be:
The leaves are something that the mommy-to-be would probably wear herself:
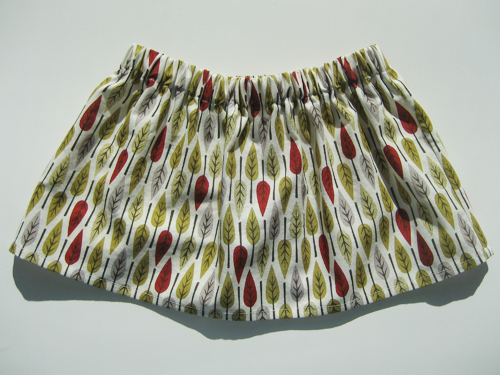
The fabrics are Michael Miller Citron Gray Bicycles and Nature Walk Organic Leaves Crimson, both purchased from Fabric.com. I ordered half a yard of each fabric and made the 12-18 month size. For the smallest size, you could get two skirts out of a half-yard — I had plenty of fabric left over. For the bicycle skirt I used the full width of the fabric (44″, less selvedges), but I felt it was a little too full, so for the leaf skirt I cut about 6 inches off the width.
(I also grooved on this tiered gathered skirt for babies, but lacked an infant for measuring and didn’t have enough coordinating fabrics around to pull it off.)
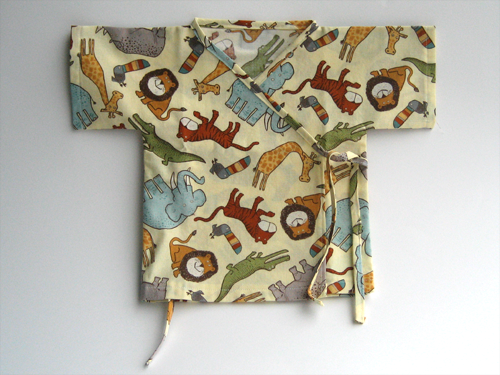
A coworker told me that when she had her baby boy last year, that in spite of all the baby clothes they had been given, the only thing she ever put him in for the first few months was a kimono-style wrapped jacket and a onesie, because they were the easiest things to get on and off. This was exactly what I wanted to hear, as I had already planned to make this kimono jacket for a friend’s expected baby. The pattern is the free simple kimono wrap from Habitual; I made the 6-12 month size. I wanted a print that was fun and suitable for a girl or boy, and I think this one fit the bill.
I was a bit confused when I added the ties, and had to rip out the one that’s supposed to tie on the inside and insert it so it went–you know–on the inside. I also tried to use a technique I learned from one of my Japanese sewing books to serge each side seam in one go, but I had to snip the stitches in the corners a little and resew them with the sewing machine. I need more practice on that one. The end result was still pretty darn cute though.
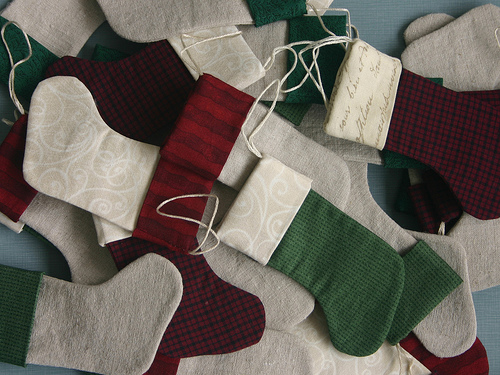
Recycling content a little here, but I finally gave away all the stocking ornaments I made a couple of years ago, so it’s time to make some more.
You can make some too, with my downloadable PDF pattern and photo tutorial.
Last year I stumbled on a pattern for an ultralight waterproof backpack posted by Jan Rezac from the Czech Republic. The pattern splits the pack into two parts: an outer shell that supports the shoulder straps and hip belt, and a waterproof dry bag that is strapped into the outer shell. The dry bag can be constructed from a very lightweight fabric because it doesn’t have any stress points for straps and it’s protected by the sides of the outer shell, and this allowed Rezac to get his pack weight down to 320 grams, or about 11 ounces. My pack is about 24 ounces and E’s is about 16 ounces, so the idea of an 11 ounce pack was intriguing.
I sent off for a bunch of fabric samples from Seattle Fabrics, and E helped pick the fabrics and other materials needed for the pack, and we ordered them… and then they sat under the chaise in my studio for a year. However, I finally got to the project, and here’s the first prototype:

Doesn’t look like much without the sleeping pad to give it some structure and with the dry bag all crumpled up inside it like that, but I still think it’s pretty cool. The various pieces are sewn from different fabrics, depending on stress and wear. The bottom is a sturdy 330 denier Cordura — tough and water resistant, for putting it down on the ground. The back is 200 denier coated Oxford — waterproof, and heavy enough to support the stress of the straps and hip belt. The sides and front are waterproof 140 denier ripstop nylon, to protect the inner bag from branches and other wear.
Here’s the back view:

The shoulder straps and hip belt are made of 1/4″ foam padding, which I perforated with a 1/4″ hole punch to further reduce the weight (marginally) and to allow it to breathe. There are also strips of grosgrain ribbon sewn to the back where the shoulder straps and hip belt are attached, to support the additional stress at those points. The hip belt is sewn in to the seam where the back and bottom meet, and attached to the lower grosgrain strip with short strips of heavy elastic, to provide support and accommodate the pack’s bouncing as you walk.
The side pockets are made of dive mesh, with a light-weight elastic gathering them into the protective sleeve at the top:

The dry bag is made of heat-sealable fabric — the outside has a waterproof coating, and the inside has a heat-sealable coating. I sewed around it with about a 1/2″ seam allowance first, then used an iron to seal the seam allowance and also 1/2″ inside the seam allowance. In theory only the heat sealing is required, but should it fail I wanted to make sure stuff wasn’t going to fall out. The webbing and velcro across the top allow the flap to be folded over a couple of times and then buckled, so it’s waterproof:

I’m not totally in love with the dry bag. I had originally purchased some 1.9 ounce silicon coated ripstop, which is much lighter but would require sealing the seams. Then I got a photocopy of the article about the heat-sealed dry bags and thought I’d try that instead. We’ll see how it works. The ripstop was also a light blue, which I suspect would be easier to find in a dark camp site.
The finished weight of our prototype, with dry bag, came to 16 ounces, which is about the same as E’s current lightweight pack (which, unlike this pack, doesn’t have a hip belt). It fits me quite well, and it seemed to adjust all right to E’s height (he’s 6′ 2″, I’m 5′ 6″). We’re going to give it a test run this month.
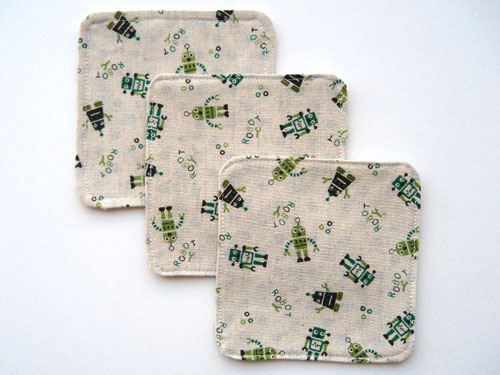
Things to do when one is procrastinating and has scraps of fairly expensive Japanese fabric that are begging to have something done with them. I’ve seen fabric coasters that have batting or flannel between the layers, but I didn’t bother. Finished size is a scant 3-3/4″ on each side.
Cut two 4″ squares of fabric. Curve the corners to make it easier to turn them inside out (I just followed the corner curves from the card wallet pattern around each corner — they have a 1/2″ radius). Place squares right sides together (if you want to add an extra absorbant fabric layer, place it on top of the other two pieces so it’s on the inside when you turn everything right-side out).
Sew around the perimeter of the coaster with a 1/8″ seam allowance, leaving about 2″ open along one side for turning. (Backstitch and the start and end of the stitching so it holds together while you’re turning.)
Turn right-side out and press flat. Fold raw edges from opening towards the inside and press so they’re straight.
Top-stitch around the entire coaster very close to the edge (I use the 2mm marker on my sewing machine foot), backstitching at the start and end.
You’re done. I told you it was going to be super fast!
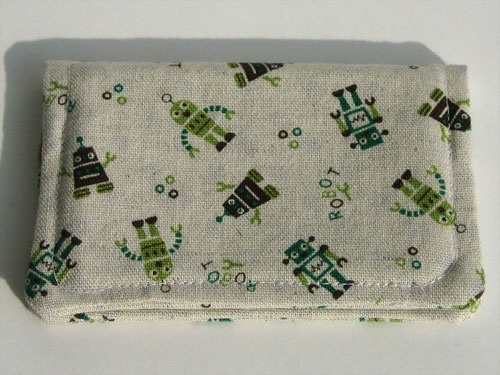
Longtime readers may recall the fabric card wallet I made some time back. Today as I was, well, procrastinating on writing an article about designing keyboard-only interactions for web sites, I started cleaning my studio and found a bunch of fabric I’d cut to make more robot wallets. Then I decided to procrastinate on cleaning my studio and make robot wallets instead. And then I decided to write a tutorial!

One thing I love about the morning fog: it diffuses light wonderfully for photography. And it usually burns off by noon.
I’ve been searching for the perfect -shirt pattern and thought I had it with my tweaked version of Jalie 2805, but this basic t-shirt from Overlock Sewing Everyday Clothes might beat it out as my favorite. Like the Jalie pattern, this one comes with several variations on the sleeves and neck, and the book includes patterns for several other top and tunic styles, a couple of skirts, camisoles and leggings. (I love everything about the outfit shown on the right in this picture – I even bought a pair of black patent ballet flats to reproduce it, and I have some deep red silk/cotton poplin earmarked for the skirt) The amazing thing is that the tutorials in the book are so clear–even though I don’t understand Japanese–that I learned more from them than the English-language serger book I have!

The wrap skirt is from One Day Sewing Winter Clothes (2007). This is less than an evening’s work. It took me a while to figure out how to work with the pattern, as there were only two pieces on the pattern sheet: turns out that those two pieces had a center mark that I needed to mirror to get the front skirt and facing. Also, for some reason I spaced on the facing and was convinced it was a waistband, and couldn’t figure out how the top of the skirt pieces were supposed to match up. Doh.

This was going to be a muslin from leftover stretch denim, and then I was going to make it up in a lighter weight gray stretch denim that I bought recently from fabric.com. But it turned out well enough that I’m going to save the gray denim for something else. I love this style though, its simplicity and architectural line, and I kind of want to make another one in black, a little shorter, maybe reversible with a crazy print for the other side…
From the Women’s News section of the Reading Eagle, Tuesday, February 2nd, 1971: an ad for the Dot Pattern System:

Um… wow. $1 for a 90 minute demonstration, and husbands admitted free? Awesome!
I had no idea Google was archiving newspapers like this. Check out the article “Fashion Disillusioned Jacques Kaplan Working on ‘Water Floor’ for the Home”, or the “You’re Sew Right” advice column, or “Jean Adams’ Teen Forum” on the same page.
When I visited my parents last, my mom loaned me The Dot Pattern System Deluxe, a pattern drafting system from 1969. The way it works is that you take your personal bust and hip measurements and then use a special tape measure to scale the pattern from the binder to your own size, by sticking one end of the tape through a cross on the pattern page and then making marks for each dot at the specified distance. So this:
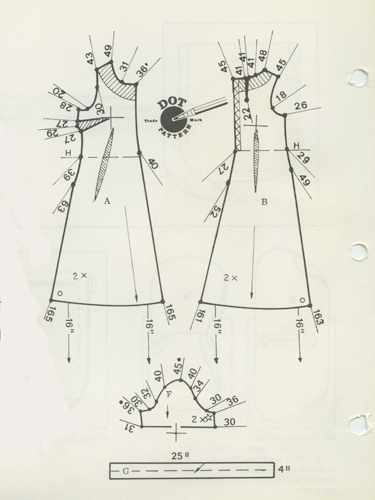
turns into this:
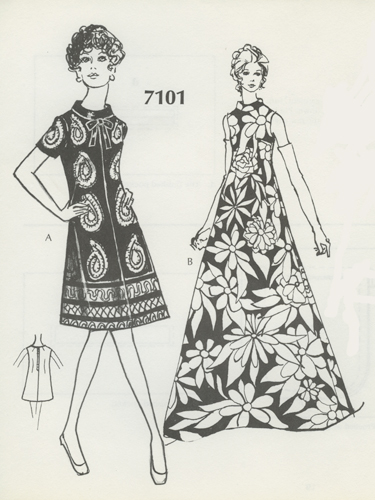
Talk about a maxi dress!
There are over a hundred patterns in the book,covering just about any type of garment you might want to make. House dress? Check:
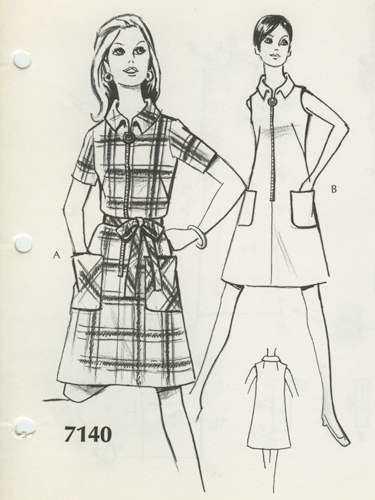
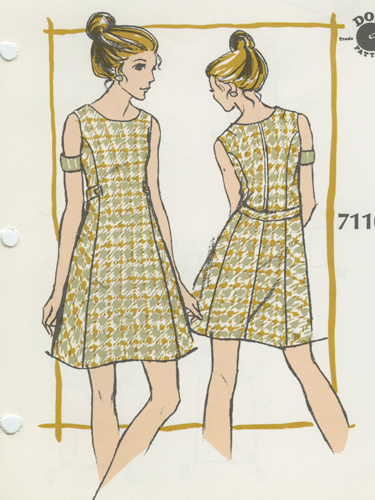
Office wear – or is this a cocktail dress? Either way, check:
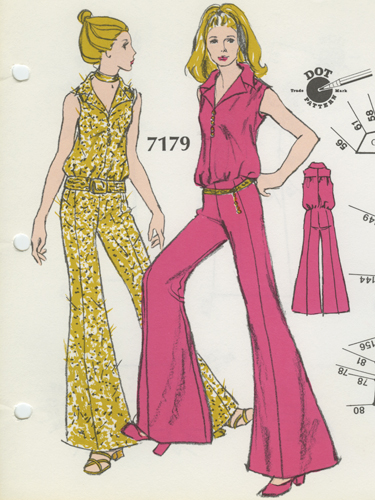
Jumpsuits? Sure…
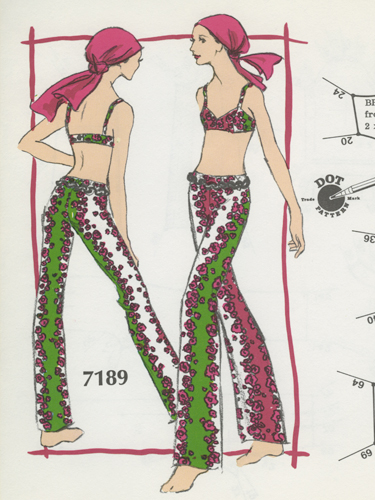
And I’m not even sure what this ensemble would be called – but you can make one:
Some of the coats are actually cute – though it’s the styling on this one that I love. Over the knee red rain boots?
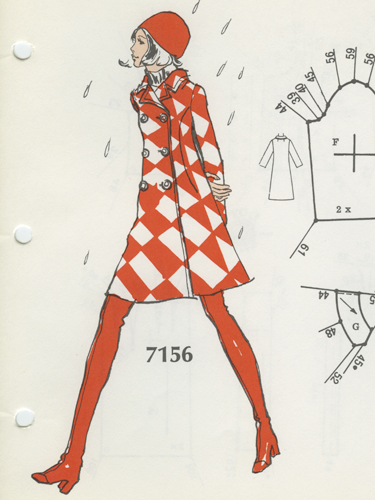
and that hat!
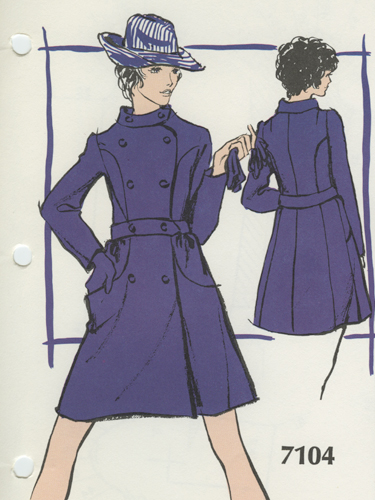
Practically, you’re also covered for your wedding:
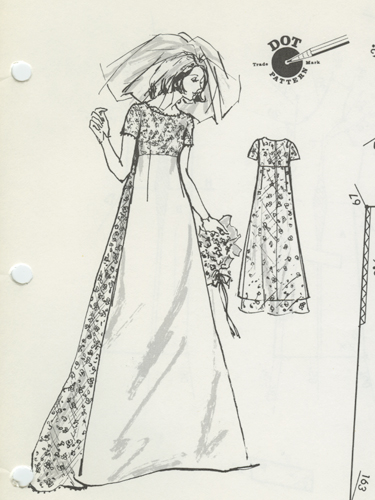
and what follows:
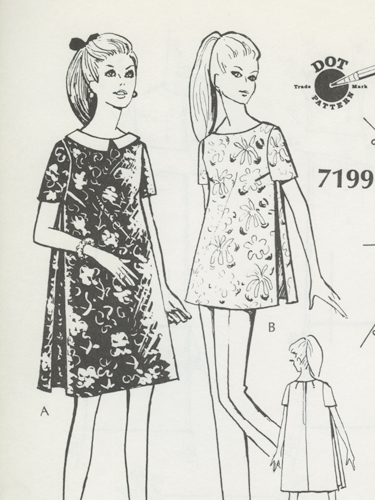
There are even patterns for your man:
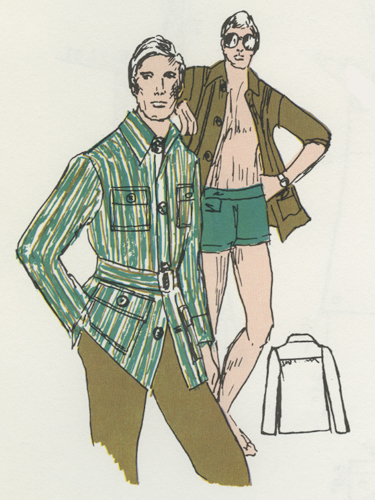
and of course the kids (creepy, creepy kids):

I actually like those two coats, and I might attempt one at some point. Or maybe something simpler to start – I could really use a house dress…