Pinwheel Flat-Back
March 3rd, 2014 | Link

Pinwheel book head detail

I went a little nuts over Christmas with the bookbinding. In the weeks leading up to November I’d been picking up text paper and cover paper and endsheet paper and tearing and cutting and folding and even a little bit of sewing, until finally I was off work and had nothing to do except put everything together. The first weekend I cased in 15 books that had been sitting around as text blocks for nearly a year, and over two weeks I finished 35 in total.

Finished size about 6-1/2″ wide by 9-3/4″ high; 160 pages in French Paper Co. Speckletone text-weight paper (70 lb). Endsheets are Hannemühle Bugra. Cover paper is Brookfield Letterpress from Hollander’s.

Cased-In Flat Back with Maziarcyzk Paste Paper Cover
February 26th, 2014 | Link

Book cover with black and silver paste paper coverSometimes I try to break out of my Japanese paper rut and pick up something a little different. The cover on this cased-in book is a paste paper by Claire Maziarcyzk, purchased from Talas (it’s the “Stainless Graphite”). A bit of an indulgence at $12.25 for an 18-1/2″ x 24-1/2″ sheet (only enough for one book plus some scraps) but handsome. One of my coworkers once lamented the lack of “man-papers” in my repertoire and this fits the bill.

Finished size about 6-1/2″ wide by 9-3/4″ high; 160 pages in French Paper Co. Madero Beach Speckletone text (70 lb). End sheets are the lovely Hannemühle Bugra I bought last fall.

A Simple Book
February 23rd, 2014 | Link

Pamphlet stitch book with screen-printed cover

A simple book can be as enjoyable as a complex one. This pocket-sized, pamphlet-stitched jotter uses a strategically cut piece of a damaged Jay Ryan poster for the cover. It took all of 15 minutes to make (thanks to my Kutrimmer). Just as nice as a small Moleskine Cahier, if not quite as sturdy, and it makes me smile whenever I look at it.

Hahnemühle Bugra
November 1st, 2013 | Link

Hahnemühle Bugra Papers

I love Hahnemühle Bugra for endpapers. Nice texture and weight (130 gsm), and takes the glue well.

I have a bunch of book blocks that I sewed up months ago and haven’t had time — or, until now, endpapers — to finish. (Also there was that little incident with the flooding that rendered my studio unusable for a while. Good times.) Someday soon…

The Reorganized Kitchen
January 14th, 2013 | Link

Some of you know this about me, but for those who don’t: I’m a bit of an organizing freak. I’m not a clean freak, but I like things to be in order. I get euphoric when I go to The Container Store; and yes, my books, CDs and other media are alphabetized. I’m pretty good at eking out more order and more storage from limited spaces. And I’m also not bad at getting rid of things that are unused, inefficient, or just not working out.

So last month, while I was procrastinating on writing reviews for my team (ahem — I’m also good at procrastinating), I decided it would be much more fun to get rid of things that weren’t being used in the kitchen. Remember the apple sauce? Turns out canning, while an enjoyable experiment, works out a lot better if you have room to store the food (not to mention the equipment). So all those accoutrements got given away. I discovered we own a kettle, which I am pretty sure hasn’t been used since my parents visited in 2005. There was an assortment of small utensils that we never use; a rather large serving dish; and an extra colander. All that has gone to Goodwill, which freed up a surprising amount of cupboard space.

Then I started thinking about what was left — what worked, what didn’t, what was commonly used but not close at hand, etc. The problems mostly boiled down to these:

  • Limited working counter space — too much stuff on the counters, and not a lot of counter to begin with.
  • Inefficient use of drawer space — not taking advantage of available space, or storing things more or less accessibly than they need to be.
  • No recycling solution. We take cardboard to the recycling downstairs but we toss a lot of smaller stuff we should be recycling.
  • Stuff buried in the back of deep cabinets that requires pulling everything out to reach it.

So after much browsing on Amazon and a few trips to The Container Store — followed by another trip to Goodwill to drop off more stuff — we have a reconfigured kitchen that is so much better! I might even start cooking! And just for you, here’s a video!

Getting stuff off the counters

  • Replaced the knife block with a wall-mounted magnetic knife strip.
  • Moved cooking utensils from a holder on the countertop to a drawer.
  • Moved the food processor and grill into newly freed up cupboards.
  • Got rid of a large breadbox that held vitamins and such, moving rarely accessed contents to high cupboards.
  • We use the toaster oven and bread machine regularly, so we kept those on the counter — but moved them to the awkward corner area, opening up workable counter space next to the sink and stove.

Reorganizing the drawers

  • Our largest drawer next to the stove held dish towels, oven mitts, and other miscellany that migrated there over time. By moving these into a smaller, lower drawer, we were able to move all the cooking utensils from the counter and about half of the contents of the other drawer into this one.
  • The cutlery drawer had an ill-fitting organizer that left unusable space around it. Replacing it with this resizable, customizable drawer organizer from OXO enabled us to also move some other small, frequently used utensils into the same drawer.
  • Moved plastic wrap, foil and wax paper from a drawer into a door-mounted rack under the sink.
  • Replaced the bulky thick dish towels that could only be stored 2-3 high with flour sack towels that fit 7 in the same space.
  • Lined the one deep drawer we have — which stores Pyrex glass containers for leftovers — with adhesive-backed cork, preventing the containers from sliding around.

Reorganizing the cupboards

  • Moved rarely used serving dishes and such to high cupboards and awkward back corners.
  • Moved overstock food items to the back of the higher cupboards (rather than mixing it in with day-to-day food).
  • Replaced the slide-out garbage can under the kitchen sink with this duo trash/recycling setup. After the first few days we switched the bins around so that the larger black bin is now used for recyclables.
  • Stored baking supplies and pantry items in the deep cupboards in plastic bins, so that they can be pulled out more easily.

The Scarves of Christmas Past
January 7th, 2013 | Link

Now that Christmas is over, I can finally show the presents I made for my mom and sister.

The first one is Tissé, by Julie Hoover, in Great Adirondack Yarn Co. Petite Silk Noir that I purchased online from Webs. This is the Hydrangea color way, and the colors range from a rich turquoise to deep purple.

Scarf in turquoise and purple with a slight herringbone texture

The variegation turned out to be lovely, but possibly too much for the subtle herringbone patterning in the stitches. One thing I was a bit disappointed to realize was that the stitch was pretty much the same as for the Henry scarf or the Herringbone Cowl — both of which are free, so spending $4 for a pattern that was basically “cast on N stitches and work in this stitch that you can get for free elsewhere” made me feel like a dumbass. But it’s pretty, and my mom seems to like it, so it’s all good. The yardage on the Petite Silk Noir is amazing (1350 yards), and I had a bunch left over. (Here’s my Hydrangea Tissé on Ravelry.)

The second scarf is a variation on the Wool Leaves baby blanket by Jared Flood, in Madelinetosh Tosh Lace in the Filigree color way. This was a bit of an experiment, as Flood’s blanket is knit in an Aran weight.

Leaf lace pattern in brown and green variegated yarn

I dubbed this the Meredith Stole, as I watched an inordinate amount of Grey’s Anatomy while knitting it. I blocked it to 20″ by 65″ long (and let me tell you, I was so glad I’d bought blocking wires when I blocked both these knits!). The lace pattern does not look as leafy as Flood’s blanket, but it’s airy and somewhat leafy. Unfortunately I think my sister was more excited by the three boxes of Orville Redenbacher Caramel Popcorn that accompanied the scarf, but such is life. (Here’s my Meredith Stole on Ravelry.)

Giveaway Winners
January 1st, 2013 | Link

Happy new year, everybody. I hope you all have a fantastic year.

To kick it off, here are the winners of my book giveaway. On digging through my boxes, I found I had three more long stitch books and two accordion albums to give away in addition to the Joel R. L. Phelps book. Nine people left comments, but Jase asked to be left out of the drawing. He’s chivalrous that way.

I’m doing the draw the old fashioned way — I wrote down everybody’s names on individual pieces of paper, and I’m pulling them out of a bag in real time as I write this!

And the winners are:

  • Elizabeth gets the Joel R. L. Phelps notebook!
  • MerryOnion gets a long stitch notebook!
  • YC gets a long stitch notebook!
  • Gayle gets a long stitch notebook!
  • Jonathan gets an accordion album!
  • Sue H gets an accordion album!

I’ll be contacting each of the winners by email to get your addresses, and will get everything out in the mail later this week. Thanks to everyone who entered, and to all the readers who have stuck around in spite of my long silences. I’ll try to update a bit more regularly this year — hopefully work and life will cooperate!

Jay Ryan, Long Stitch Bindings and a Giveaway
December 17th, 2012 | Link

I’ve been selling some of my Jay Ryan prints on eBay. I have a subscription to his work: twice a year he sends me a bundle with one of each poster he’s made to date. It makes me very happy to go through the stack of posters when they arrive, and then I put most of them on the bottom shelf of my paper cart and don’t look at them again until the next shipment arrives. I’ve framed a bunch but our condo is pretty much a Jay Ryan shrine at this point, so in the interest of having room to store next year’s subscription, I’m letting go of some of the ones I love less.

The first year I had a subscription USPS severely damaged one of the shipments, essentially folding the posters in thirds. When I rediscovered them recently I didn’t want to sell them in that condition, and the paper is a great weight for non-adhesive books, so I decided to make some books out of them.

This is the Built to Spill long stitch, which I am keeping for myself because it makes me laugh every time I look at it.

Cover paper of cartoon orange traffic cones with bear parts scattered among them

This is the Joel R.L. Phelps long stitch, which I am giving away!

Brown, orange and gray paper with abstract squiggles

The book is about 9″ by 6″ and the pages are 100lb Mohawk Superfine in the soft white eggshell finish.  There are six sections with 16 pages per section, for a total of 96 pages. I glued an extra piece of card stock to the spine to help support the stitching, but otherwise it’s non-adhesive – the stitches hold the cover and sections together like magic.

Top view with spine open about 120 degrees and pages fanned out

If anyone is still reading after my lengthy absences this year, all you have to do to enter the giveaway is leave a comment before 11:59 pm Pacific Standard Time, December 31st, 2012. It’s OK if you’re not in the US, as long as you can be reached by mail. You don’t have to leave your real name, but I will need a real email address to contact you if you win (it won’t be displayed in your comment). I also have a couple of these small long stitch journals left, so the first name I draw will get this one, and I’ll keep drawing until I run out of books. I’ll make the drawing January 1st, 2013.

Growing and Outgrowing
December 15th, 2012 | Link

Four small handmade hard-cover books

I thought for a while that I was done with bookbinding. I was going to finish what I’d started with the paper that I prepped last year, and then move on. I made 24 Coptic journals as part of my summer Discardia project and thought about what I was going to do after. And then I ordered another ream of paper, more bookboard and cloth and cover paper, and signed up for a multi-session binding class at the San Francisco Center for the Book. Apparently I’m not quite done with bookbinding after all.

(What I am done with, though, is sewing. Or at least apparel sewing. I still enjoy sewing small craft projects, so I’ve kept the sewing machine and serger and other accoutrements. But I got rid of several shelves worth of apparel fabric and sewing books, and moved the sewing stuff to an out-of-the-way part of my studio to free up space for other things.)

One of the things that had put me off bookbinding was the feeling that I felt I’d hit a plateau, where my skills had caught up to the challenges and it just wasn’t very interesting any more. But when I thought about it further, there were two parts to my disinterest. Yes, I am bored with Coptic journals and accordion books. But there are many other book structures and much more to learn. The last time I made hardcover journals, a year ago, I realized I’d forgotten a lot. So I signed up for the Beginning Bookbinding Core Curriculum course at SFCB and spent four Saturdays relearning things – and learning new things too.

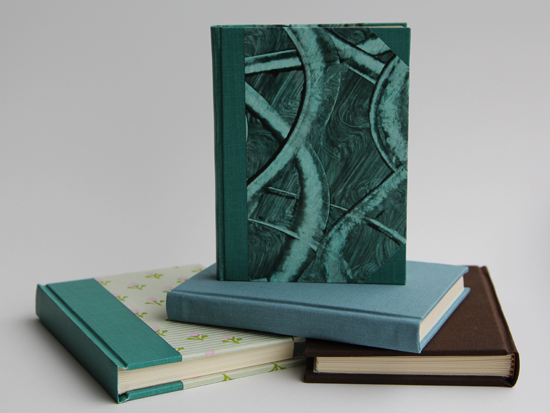
The Beginning Bookbinding course is the first of two courses for the SFCB Bookbinding Certificate program. It covers a couple of variations on hardcover bindings and covers how to use the board shear, guillotine cutter and other tools at the center. Over four weeks I made four books, shown below in order:

Four books lined up and showing the top edges
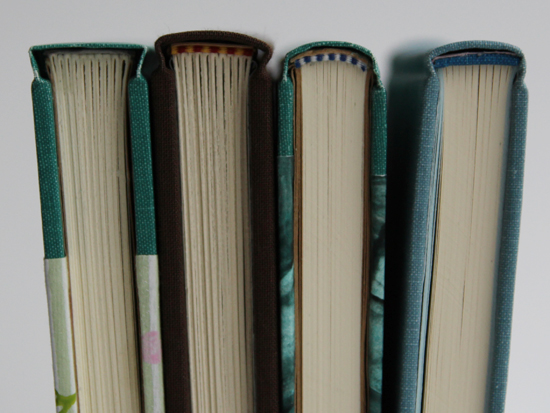
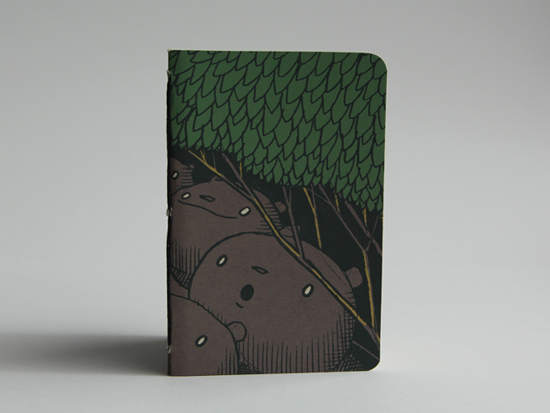
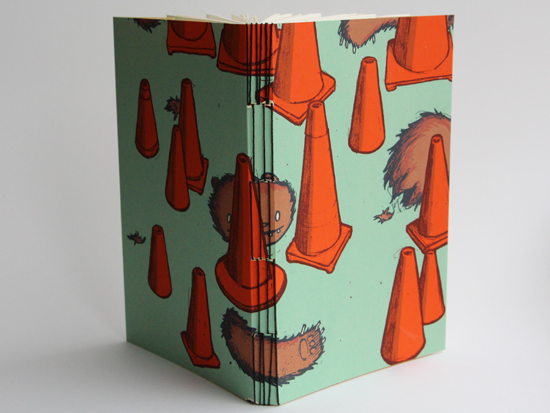
The first two were flat-back, case bound books, which is the method I learned previously. In these, you construct the book block and the case separately, and then put them together. We made the book blocks for these using a link stitch, which was new to me (though a lot like Coptic binding), rather than sewing onto tapes. The latter two were made by constructing the book block by sewing the sections onto tapes, and attaching the cover boards to the book block before adding the bookcloth and decorative paper. The backs are also rounded, although as you can see I had some mixed results with that.

Top view of book that is feathered open to show end papers and book block rounding

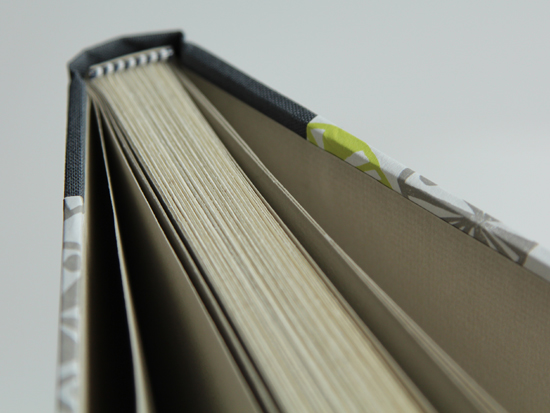
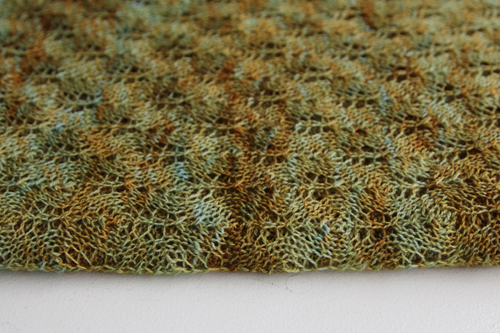
This was the first rounded one, which was somewhat more successful as far as rounding goes. I had some trouble getting the spine piece centered correctly, so it is a bit wonky. We cut the blocks on these with the guillotine cutter, so you can see how smooth the edges are.

Close-up view of spine rounding, with endband

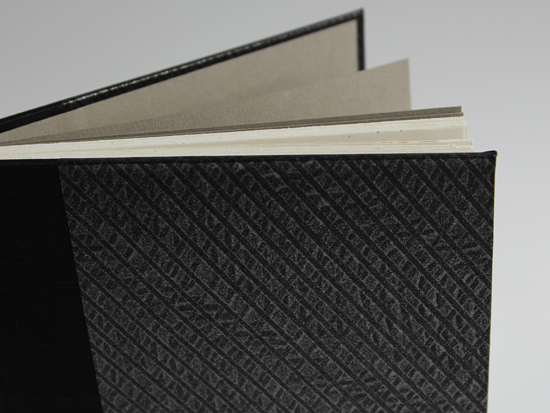
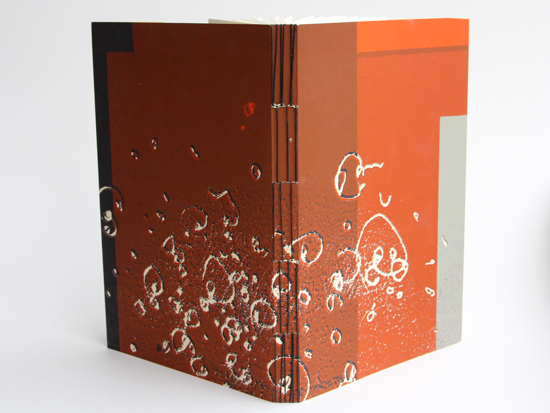
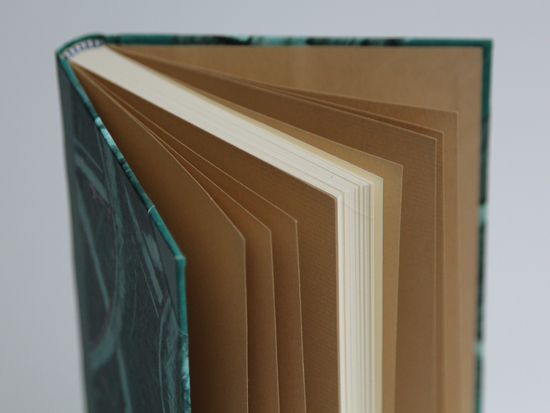
This one I had some trouble with. At first I thought I’d rounded it really well, but after I got the endbands on it did not look rounded at all – though it might just be the endband that isn’t rounded, the foreedge of the book still looks good. This one was also interesting because it used a hollow tube at the spine rather than gluing on several individual layers of spine lining, and then the bookcloth is glued right to the spine (a tight-back binding).

So now I have several new techniques to practice, and I also bought a new lying press from Affordable Bookbinding Equipment that is lovely, and wooden nipping press that I’m not quite as impressed with (on mine, the bottom plate of the press is sitting on top of a 2×4 – unlike the one pictured where the bottom plate is flush with the table – so it’s unsteady). And I have a little time off over the holidays to play with everything.

Red Blossoms Coptic
September 28th, 2012 | Link

Two-needle Coptic binding; 9-5/8″ high by 6-7/8″ wide, with 128 pages in 8 sections. The pages are Mohawk Superfine 100lb text weight in smooth soft white. The cover paper is Japanese Chiyogami paper, which is a mixture of kozo and sulphite. This particular paper is Chiyogami 601 from The Paper Place.

This is the last entry for Coptic Month!

Search

About

My name is Shannon Hale. This blog is on indefinite hiatus, but it contains archives of the last 10 years of posts about bookbinding, knitting, sewing. and other random things in my life.

Previously

2014: 1 2 3 4 5 6 7 8 9 10 11 12

2013: 1 2 3 4 5 6 7 8 9 10 11 12

2012: 1 2 3 4 5 6 7 8 9 10 11 12

2011: 1 2 3 4 5 6 7 8 9 10 11 12

2010: 1 2 3 4 5 6 7 8 9 10 11 12

2009: 1 2 3 4 5 6 7 8 9 10 11 12

2008: 1 2 3 4 5 6 7 8 9 10 11 12

2007: 1 2 3 4 5 6 7 8 9 10 11 12

2006: 1 2 3 4 5 6 7 8 9 10 11 12

2005: 1 2 3 4 5 6 7 8 9 10 11 12