Woven Chain Albums
November 6th, 2011 | Link

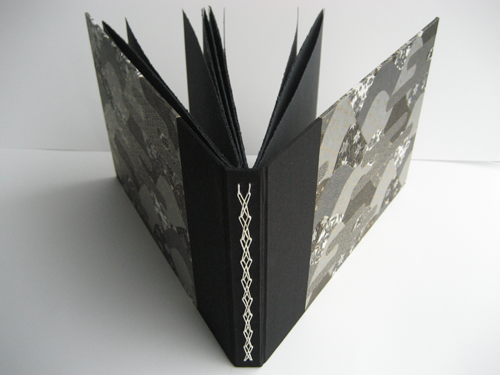
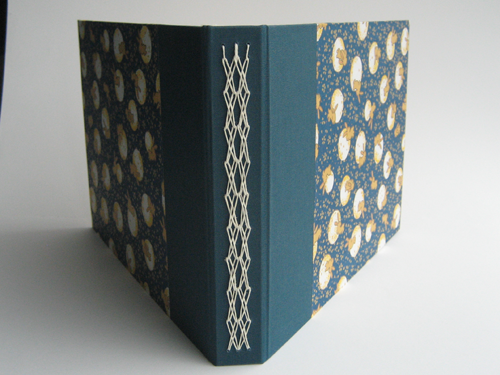
Spine detail showing woven chain stitch

This has to be one of the most elegant exposed stitch bindings around: it’s the Woven Chain sewing from the second volume of Keith Smith’s non-adhesive binding series, 1- 2- & 3-Section Sewings. I used it some time back for Jane and Patrick’s wedding guest book, of which the baby-themed album above is pretty much an exact copy, aside from the paper.

Spine detail of second album which has only one chain

The baby album and Jane and Patrick’s guest book both have three sections of Rives BFK cover-weight paper totaling 24 pages. The black album above has only two sections, so there’s only one line of chain to link the sections together. I think this album, with the elegant paper and slubbed, silky bookcloth, suits the elaborate nature of the stitching better than the matte bookcloth and bunnies in the baby album. But both are nice.

Long Stitch Journals
October 26th, 2011 | Link

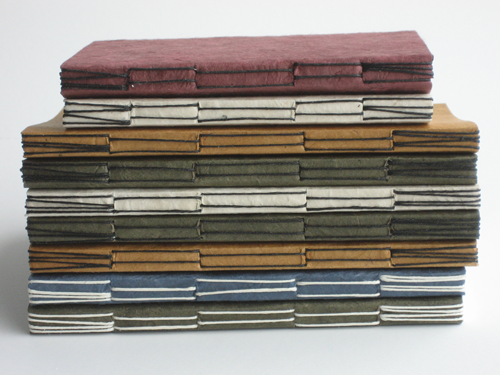
Stack of long stitch journals in assorted colors, with the spine stitching showing

I love non-adhesive long stitch bindings when I feel like making something but I don’t feel like dealing with all the mess and time involved in making hard cases. Look ma! No glue!

These are an old standby from Keith Smith’s Non-Adhesive Binding I: Books Without Paste or Glue. Each one has approximately 64 pages of Mohawk Superfine paper; the weights and sizes vary because I was experimenting with folding down large sheets and using up whatever was lying around the studio, but the largest are about 4″ by 6″. The covers are Lokta Bark paper purchased from Hollanders.

sev[en]circle Again
October 22nd, 2011 | Link

Cowl of seven knitted circlets attached in the back

This is my second round with assemblage’s sev[en]circle cowl. I wear my first one a lot, but I thought it would be fun to have one in a color other than black, since everything I wear it with is also black. I fell in love with this lovely dark desaturated teal-gray silk/merino yarn at Habu Textiles when I was in New York last winter and decided it would be perfect. And so it is!

Hardcover Journals in Gray
October 14th, 2011 | Link

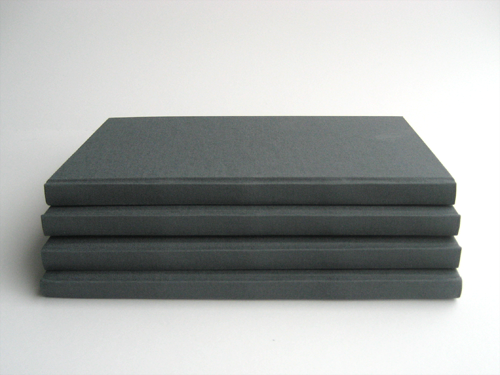
Stack of four journals

As much as I enjoy working with Japanese papers, when it comes to the books I use at work I like a workhorse — something I can toss in my backpack without worrying about it. I like a paper with a good tooth; a spine I can open wide (if not flat); and not too many pages, because I like to use one book per project.

For this set I used slate-colored Iris bookcloth I purchased ages ago from Talas, both for the covers and for the paste-down inside. The paper is Mohawk Superfine, and in a soft white eggshell finish around 118gsm. I only had 10 sheets so each book has 5 sections with 4 folios each, for 80 pages; each book is around 6-1/4″ wide by 9-3/4″ high.

I remember now that I had bought more than usual of the bookcloth with the idea of Gocco-ing or block printing something on the covers. For this batch I’m happy with the pristine gray, but I might experiment more with that idea later.

Hakusa in Black and… Black
October 10th, 2011 | Link

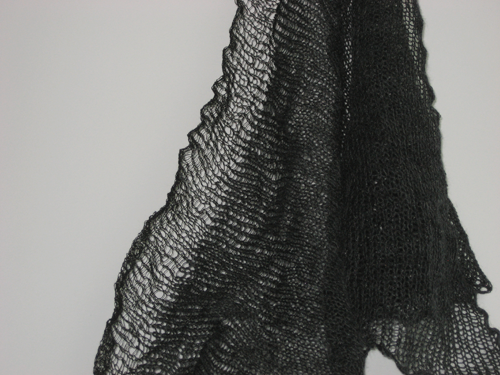
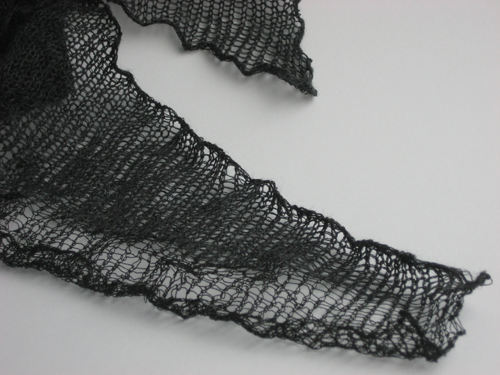
Black and grey scarf detail

I love assemblage’s knit designs. And the things she sews, but especially her knits. This is the Hakusa scarf, knit from Habu A-21 (silk-wrapped stainless steel) and Habu N-75 (merino).

Edge detail of Hakusa scarf

The pattern starts with a few rows of A-21 alone, and then the N-75 gets pulled in for the rest of the scarf. Because the stainless steel holds its shape a bit when crumpled, it’s possible to get a sculptural feeling out of it.

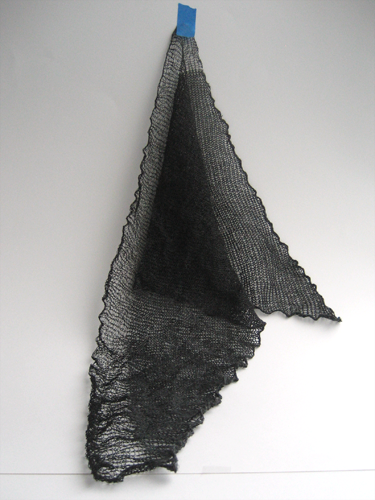
Full scarf view hanging from a piece of tape on the wall

The full scarf is an irregular triangle, and the merino and silk make it softer than you would expect from something knit with stainless steel. We’re heading into scarf weather again in San Francisco, so I expect to be wearing this a lot very soon.

In Search Of… Gluten-Free Pizza
September 11th, 2011 | Link

I have not given up on my plans to try one new recipe a week. It hasn’t quite been every week, but it’s been more than usual. Unfortunately, it hasn’t always worked out.

After my moderate success with the gnocchi, I decided to try some real baking: pretzels. That attempt ended in tears: the dough completely failed to rise and refused to be rolled (much less shaped into anything pretzel-like) and pretty much looked like anemic dog poop on the baking pan, and I binned it without even trying to cook it. That dampened my enthusiasm for the whole try-cooking-new-things thing quite a bit.

Friday I took another shot at it, this time with pizza crust. E. had been hiking all week and I wanted to surprise him. I used the Gluten Free on a Shoestring recipe (as I had with the pretzels), and again, epic fail. The dough failed to rise at all, and was pretty much a dense, heavy brick. I don’t know if it’s the flour (Bob’s Red Mill All-Purpose), or if the yeast was bad, or if it’s because I clobbered it in the food processor, or perhaps didn’t clobber it enough. Fail, fail, fail.

When I was at the grocery buying flour for the pizza, I also picked up a box of Arrowhead Mills Gluten Free Pizza Crust Mix, figuring (apparently wisely) that if the scratch version went the way the pretzels had, I could try the mix and see how that went. So yesterday I tried it.

It wasn’t perfect. I followed the directions carefully, first dissolving the yeast in water (which the Shoestring recipe doesn’t say to do), then stirring in the dry ingredients by hand until it came into a ball, and turning it out on a board to (try to) knead it for 10 minutes. But it was so sticky I had to keep dumping more flour on the board to keep it from sticking. After about 10 minutes of swearing and punching at the dough (occasionally managing to knead it properly) and scraping it off my fingers, I put it in a bowl with a damp towel over it, and put it in the oven to rise (along with a bowl of hot water that I had placed in a few minutes previously, on a tip I’d found on the ‘web).

And… it didn’t. When I took it out 1/2 hour later it looked the same as when I’d put it in. It was, however, significantly less hockey-puck like than my previous attempt, so E. convinced me to bake it anyway. I think by this point I’d so tortured him with the idea of pizza–which he once loved but has not able to eat since long before before we discovered his wheat allergy–that he would have eaten it regardless of how it turned out.

Well, this is how it turned out:

The last slice of pizza in a pan

It wasn’t bad! The crust was slightly spongy (not dense and cracker-like, as I’d feared), and had sufficient structural integrity to pick up a piece to eat. We topped it with a can of pizza sauce, ground turkey, minced onions, half of a leftover tomato that was nearing the end of its useful life, and a mixture of grated reduced-fat mozzarella and fat-free cheddar (which we added after about 10 minutes of baking).

I had two slices and E. ate the rest, and was so pleased with it that he wants to make the second one (the mix makes two crusts, so we put one in the fridge) tonight.

And so I am emboldened to try again.
A Few of My Favorite Bookbinding Tools: Steel Weights
September 4th, 2011 | Link

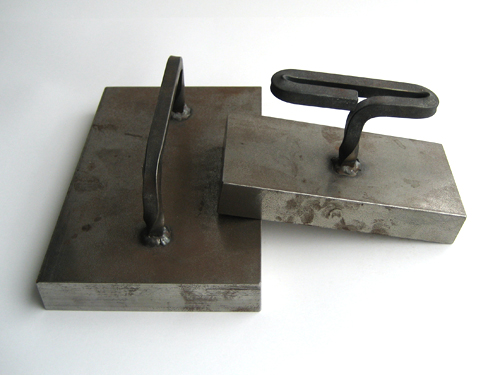
Two steel rectangles of various sizes, about 1 inch thick, with steel handles welded on.

A few years ago I had a 19-year-old coworker who had an appreciation for the handmade, and was building his own electric car. In exchange for two large photo albums, he made me these excellent steel weights. The larger one is 8″ by 5″ by 1″ thick, and weighs about 12 pounds. The smaller one is 6″ by 3″ by 1″ thick, and weighs about 7 pounds.

I got along for a long time just weighting things down with stacks of heavy books, but the steel weights are so much easier to deal with and look so good, they are probably my favorite tools. I wish I had another set!

OK, bookbinders: what’s your favorite tool?

My Photo Studio
August 20th, 2011 | Link

For those who are curious, this is my setup for photographing books and other small items. Our condo has south-facing windows with wide sills, so I tape a sheet of cardstock to the wall, drape it onto a cardboard box, then drape a second sheet of cardstock to the sill. The box raises the book to a level height with the tripod (which is a small, table-top version):

White cardstock is taped to the wall and curves onto a box and then down the front of the box. A book sits on the box. There's a large window on the right, letting in diffused light.

Often the light is diffused nicely by fog in the morning, and very little post-processing work in Photoshop is required — occasionally I need to add a curve layer to lighten things up. But I have a short window of time in which to get set up and shoot before the fog burns off and the sun comes through.

OMG – I Made a Book!
August 18th, 2011 | Link

Cream colored thread sewn in four sets of parallel vertical stitches running most of the height of the book, with a row of horizontal link stitches at the top and bottom.

Maybe some of you despaired that this day would ever come, but fear not: I haven’t given up on bookbinding. It was just a hiatus.

The book is fanned open and shot from the back, showing the spine detail as well as how the bookcloth wraps around and meets the decorative paper on the front.

I had cut out all the pieces for this book (and several others) some time ago — probably near the end of 2009 — and then never assembled them. It was so long ago that I forgot what I had planned to do with each set of pieces, and I’d forgotten some of the processes that used to come naturally. So this book was a big relearning experience.

The sewing is an old standby, the long stitch and link stitch binding from Keith Smith’s Non-Adhesive Bindings Volume 1. This was actually my first oops moment: I drilled the holes, then realized I had meant this to be a photo album with only four sections — the sewing uses two sections per each set of stations. Fortunately I had more Mohawk Bristol Drawing paper and was able to come up with four more sections. So now it’s a sketch book instead of a photo album. Sometimes you just have to roll with things.

The cover paper has large white flowers on an olive background that matches the bookcloth

The final size is 9-1/2″ wide by 7-1/2″ high by 1-1/2″ thick, with 96 pages. The cover is a matte Chiyogami paper from The Paper Place, with Asahi bookcloth on the spine.

Backpack Prototype in Action
August 5th, 2011 | Link

We drove an hour north of San Francisco for a couple of days of hiking at Point Reyes National Seashore. And while we were there, we got live action pictures of the pack!

Side view:

Side view of me wearing a backpack, with the California coast in the background

Back view:

Back view of the fully packed backpack on my back, with a seating pad anchored by horizontal straps

That’s my seating pad in the back there — the sleeping pad is tucked inside the frame of the pack. It’s the same kind of accordion fold foam pad, 20″ wide by 51″ long. The pack probably wouldn’t fit a full-sized (72″) pad — there are 7 folds in this one and it was tight.

After two days, I will say that so far it’s pretty comfortable — we weren’t carrying much weight, but aside from needing to rethread the shoulder straps properly so they can be easily adjusted, there weren’t any major issues. I will probably put in a couple more pockets on the sides for the next one. And, I need to make some kind of wrapper or case for my water bladder — it’s sandwiched between the dry bag and the sleeping pad, and it squeaks as it rubs against the foam pad.

Search

About

My name is Shannon Hale. This blog is on indefinite hiatus, but it contains archives of the last 10 years of posts about bookbinding, knitting, sewing. and other random things in my life.

Previously

2014: 1 2 3 4 5 6 7 8 9 10 11 12

2013: 1 2 3 4 5 6 7 8 9 10 11 12

2012: 1 2 3 4 5 6 7 8 9 10 11 12

2011: 1 2 3 4 5 6 7 8 9 10 11 12

2010: 1 2 3 4 5 6 7 8 9 10 11 12

2009: 1 2 3 4 5 6 7 8 9 10 11 12

2008: 1 2 3 4 5 6 7 8 9 10 11 12

2007: 1 2 3 4 5 6 7 8 9 10 11 12

2006: 1 2 3 4 5 6 7 8 9 10 11 12

2005: 1 2 3 4 5 6 7 8 9 10 11 12